About the author
@catalinmpit is a software engineer, Developer Advocate at Hashnode AWS community builder and technical writer based out of London.
Check out more of his work on catalins.tech and his YouTube channel
Node.js and Express are commonly used in tandem to build applications. This tutorial will help you get started with Node.js and Express by building a simple web server. This article is written assuming the reader is very new to web development. Feel free to skip sections and explanations if they cover things you already know.
Your server will serve up an HTML page, which will be accessible by others, and by the end of the article, you will have basic knowledge about:
- Node.js
- Express
- npm
- Creating Express routes
- Serving HTML
- Setting up static assets in Express
PRO TIP: Resist the urge to copy the code examples. Writing everything out will help you learn and retain the concepts.
Create and initialize the project
First, create an empty folder for the project. You can create one in the usual way, or you can create it from the terminal using:
mkdir express-server
cd express-server
Now that you have an empty project, it’s time to initialize it. In the terminal, run the following command:
npm init -y
The npm init -y command creates the package.json file and initializes it with the default values. If you want to
fill the fields manually, remove the -y flag and follow the instructions in the file.
Add Express
The Node.js project has been initialized, but Express still needs to be added.
To add Express into your Node.js project you’ll need to install it. To install packages in Node.js, this can be done
by running npm install packageName.
To add the latest stable version of Express, run the following command:
npm install express
Now that Express is installed, the package.json file should look like this:
{
  "name": "express-server",
  "version": "1.0.0",
  "description": "",
  "main": "index.js",
  "scripts": {
    "test": "echo \"Error: no test specified\" && exit 1"
  },
  "keywords": [],
  "author": "",
  "license": "ISC",
  "dependencies": {
    "express": "^4.17.1"
  }
}
You can see that Express was installed successfully since it’s listed under the “dependencies”.
Now, let’s move onto the next step - creating the server.
Create an Express server
Before proceeding further, you’ll need to create the JavaScript file for the web server. This can be done by running the following command in the terminal:
touch index.js
To create the server, start by opening the file and adding the following lines to the top of the file:
const express = require('express');
const app = express();
What are these two lines doing?
- The first line imports Express into the project so it can be used. Each time a package is added to the project, you’ll need to import it into the file where you want to use it.
- The second line calls the
expressfunction, which creates a new application and then assigns the result to theappconstant.
Creating routes and listening on a specific port
In the simplest terms, a route represents an endpoint which people can access. A route is associated with an HTTP
method (e.g. GET, POST, PUT, and DELETE), and takes a URL path. It also takes a function which is called when the endpoint is accessed.
Add the following code in the file:
app.get('/', (req, res) => {
    res.send({ message: 'Hello WWW!' });
});
Here’s an overview of what this is and what it does:
- It’s associated with an HTTP method (verb) - in this case, it’s the
GETverb. - It takes a URL path - in this case, it’s the homepage (
/). - It takes a function which will be called when the endpoint is accessed.
So when a GET request is made to the homepage - localhost:3333, the arrow function is called and will display
“Hello WWW!”.
Lastly, a “listener” will need to be set up. This can be done by setting a specific port for the application. Add the following code at the end of the JavaScript file:
app.listen(3333, () => {
    console.log('Application listening on port 3333!');
});
The listen method will need to be called to be able to start the server. You can also replace the
port number (3333) if you’d like.
Access the app in the browser
To start the application, run the command node index.js in the terminal. Note that index.js is the name used in
this tutorial. The server file can be renamed as well (ie - app.js).
Now that the server is running, it can be accessed in the browser. Open http://localhost:3333/, and you should see the following message:
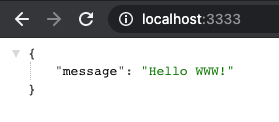
Well done! This is a basic Node.js + Express server.
In the next section, we’ll go over how to set up static assets such as JavaScript, CSS, HTML, images, etc.
Static assets
Wouldn’t this application look a lot nicer with a bit of structure and styling?
In this section, you will see how to set up and serve static assets such as HTML, CSS, JavaScript, and images.
Import the path module
First, import the path module into the application. Nothing needs to be installed because the “path” module is
included by default with Node.js.
At the top of your file, add the following line:
const path = require('path');
Why is the path module needed? This module allows us to generate absolute paths, which will be needed to serve
static assets.
Add the following line of code to the application above where the routes are defined:
app.use(express.static(path.join(__dirname, 'public')))
path.join takes two arguments:
- The current working directory (cwd).
- The directory we want to join with the cwd.
As an exercise, try printing out to the console path.join(__dirname, 'public').
At this point, the server file should look something like this:
const path = require('path');
const express = require('express');
const app = express();

app.use(express.static(path.join(__dirname, 'public')))

app.get('/', (req, res) => {
    res.send({ message: 'Hello WWW!' });
});

app.listen(3333, () => {
    console.log('Application listening on port 3333!');
});
Create public and add assets
The next step is to create a public folder and add assets to it. Create the folder and access it in the terminal by
running the following commands:
mkdir public
cd public
Next, create some empty files where HTML, CSS and JavaScript will be added. Run the following commands in the terminal:
touch app.js
touch index.html
touch styles.css
For this tutorial we’ll keep app.js simple - by only showing an alert to make sure it works. Open app.js
and add the following line:
alert('it works');
Similarly, we’ll keep styles.css simple as well. To make sure it works, set the background colour to blue. Add
the following code in styles.css:
html {
    background-color: blue;
}
Lastly, to display all this on the homepage, HTML content will need to be added to the HTML file. Open the file index .html and add the following:
<!DOCTYPE html>
<html lang="en">
<head>
<meta charset="UTF-8">
<meta name="viewport" content="width=device-width, initial-scale=1.0">
<script src="/app.js"></script>
<link rel="stylesheet" href="/styles.css">
<title>My server</title>
</head>
<body>
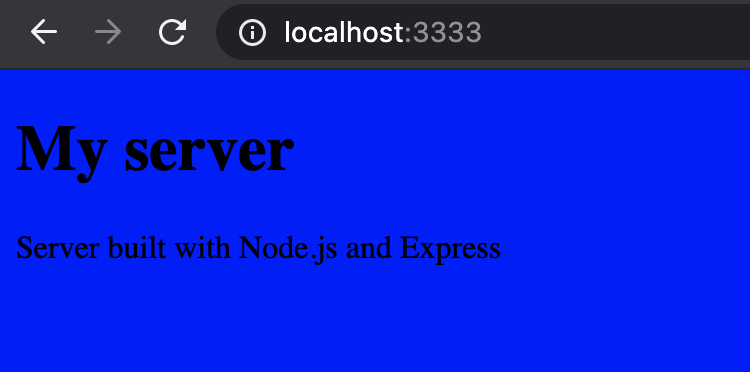
<h1>My server</h1>
<p>Server built with Node.js and Express</p>
</body>
</html>
There’s just one step left…
Serve the HTML file
All that’s left is to serve the HTML code. To do that open the server file (so far we have used index.js) and
add the following:
app.get('/', (req, res) => {
    res.sendFile(`${__dirname}/public/index.html`);
});
If it’s not your first time using Node.js and Express, you may be wondering what the method sendFile does, and why
we aren’t using the render method. Since an engine is not being used (e.g. Pug, EJS, and so on) the
render method can’t be used. Instead, the HTML file will be sent down to the client when it accesses the homepage.
The final version of the server code should look like this:
const path = require('path');
const express = require('express');
const app = express();

app.use(express.static(path.join(__dirname, 'public')))

app.get('/', (req, res) => {
    res.sendFile(`${__dirname}/public/index.html`);
});

app.listen(3333, () => {
    console.log('Application listening on port 3333!');
});
If you open http://localhost:3333, you should see a webpage with a blue background (of course, after you close the
annoying pop-up), which should look something like this:
Conclusion
Well done. If you were new to Node.js and Express prior to reading now you have a basic understanding of:
- Node.js
- Express, and how to use it to create a small web application
- How to create routes using Node.js + Express
- How to set up static assets, like JavaScript, HTML, CSS and images, in a Node.js + Express application
- How to serve a simple HTML file in Express
Check out more of Catalin’s work on catalins.tech and his YouTube channel