About the author
@catalinmpit is a software engineer, AWS community builder and technical writer based out of London.
Check out more of his work on catalins.tech
This “crash course” covers how to use KeystoneJS in a practical, real-world application. What is KeystoneJS? What is KeystoneJS good for? KeystoneJS is headless CMS and GraphQL API for Node.js applications. This guide is designed for both seasoned developers and non-developers. Feel free to skip ahead of the sections that explain general software engineering concepts that you’re already familiar with.
In a few minutes, you’ll be able to build a simple inventory app. The example we’ll use is book reviews, but the same concept can be used for anything.
1. Install Keystone
The documentation does a great job explaining how to get started with KeystoneJS, check out the Requirements and Database setup sections before proceeding.
You can initialize a Keystone application using either npm or yarn:
npm init keystone-app my-app

yarn create keystone-app my-app
The steps that follow will assume yarn is used.
After running the commands, you will be prompted to answer five questions. The purpose of those questions is to configure a default project:
- What is your project name? - Choose whatever name you want for your project.
- Select a database type - Here, you can choose between 3 options:
- MongoDB (we will use Mongo for this tutorial)
- PostgreSQL
- Prisma
- Where is your database located? - If you’re using MongoDB from your machine, the URL should be
mongodb://localhost/db_name(replacedb_namewith whatever you want to name the database). - Test database connection? - Options:
Yes/No. I recommendYesso you can test the database connection before moving forward. - Select a starter project - Here, you can select pre-configured projects. You can choose between 4 options:
- Starter (Users + Authentication) - Simple starting point with users and basic authentication
- Blank - A completely blank project. Provides an AdminUI and GraphQL App ready for to you configure
- Todo - A very simple Todo app with a static front-end written in good old HTML, CSS and JavaScript
- Nuxt - A simple app using the NuxtJS front-end framework
Select the blank option for this exercise to start from scratch.
Next, the required dependencies will be installed. This may take a minute or two.
2. Open the project
After the dependencies are installed, you’ll see the following output:
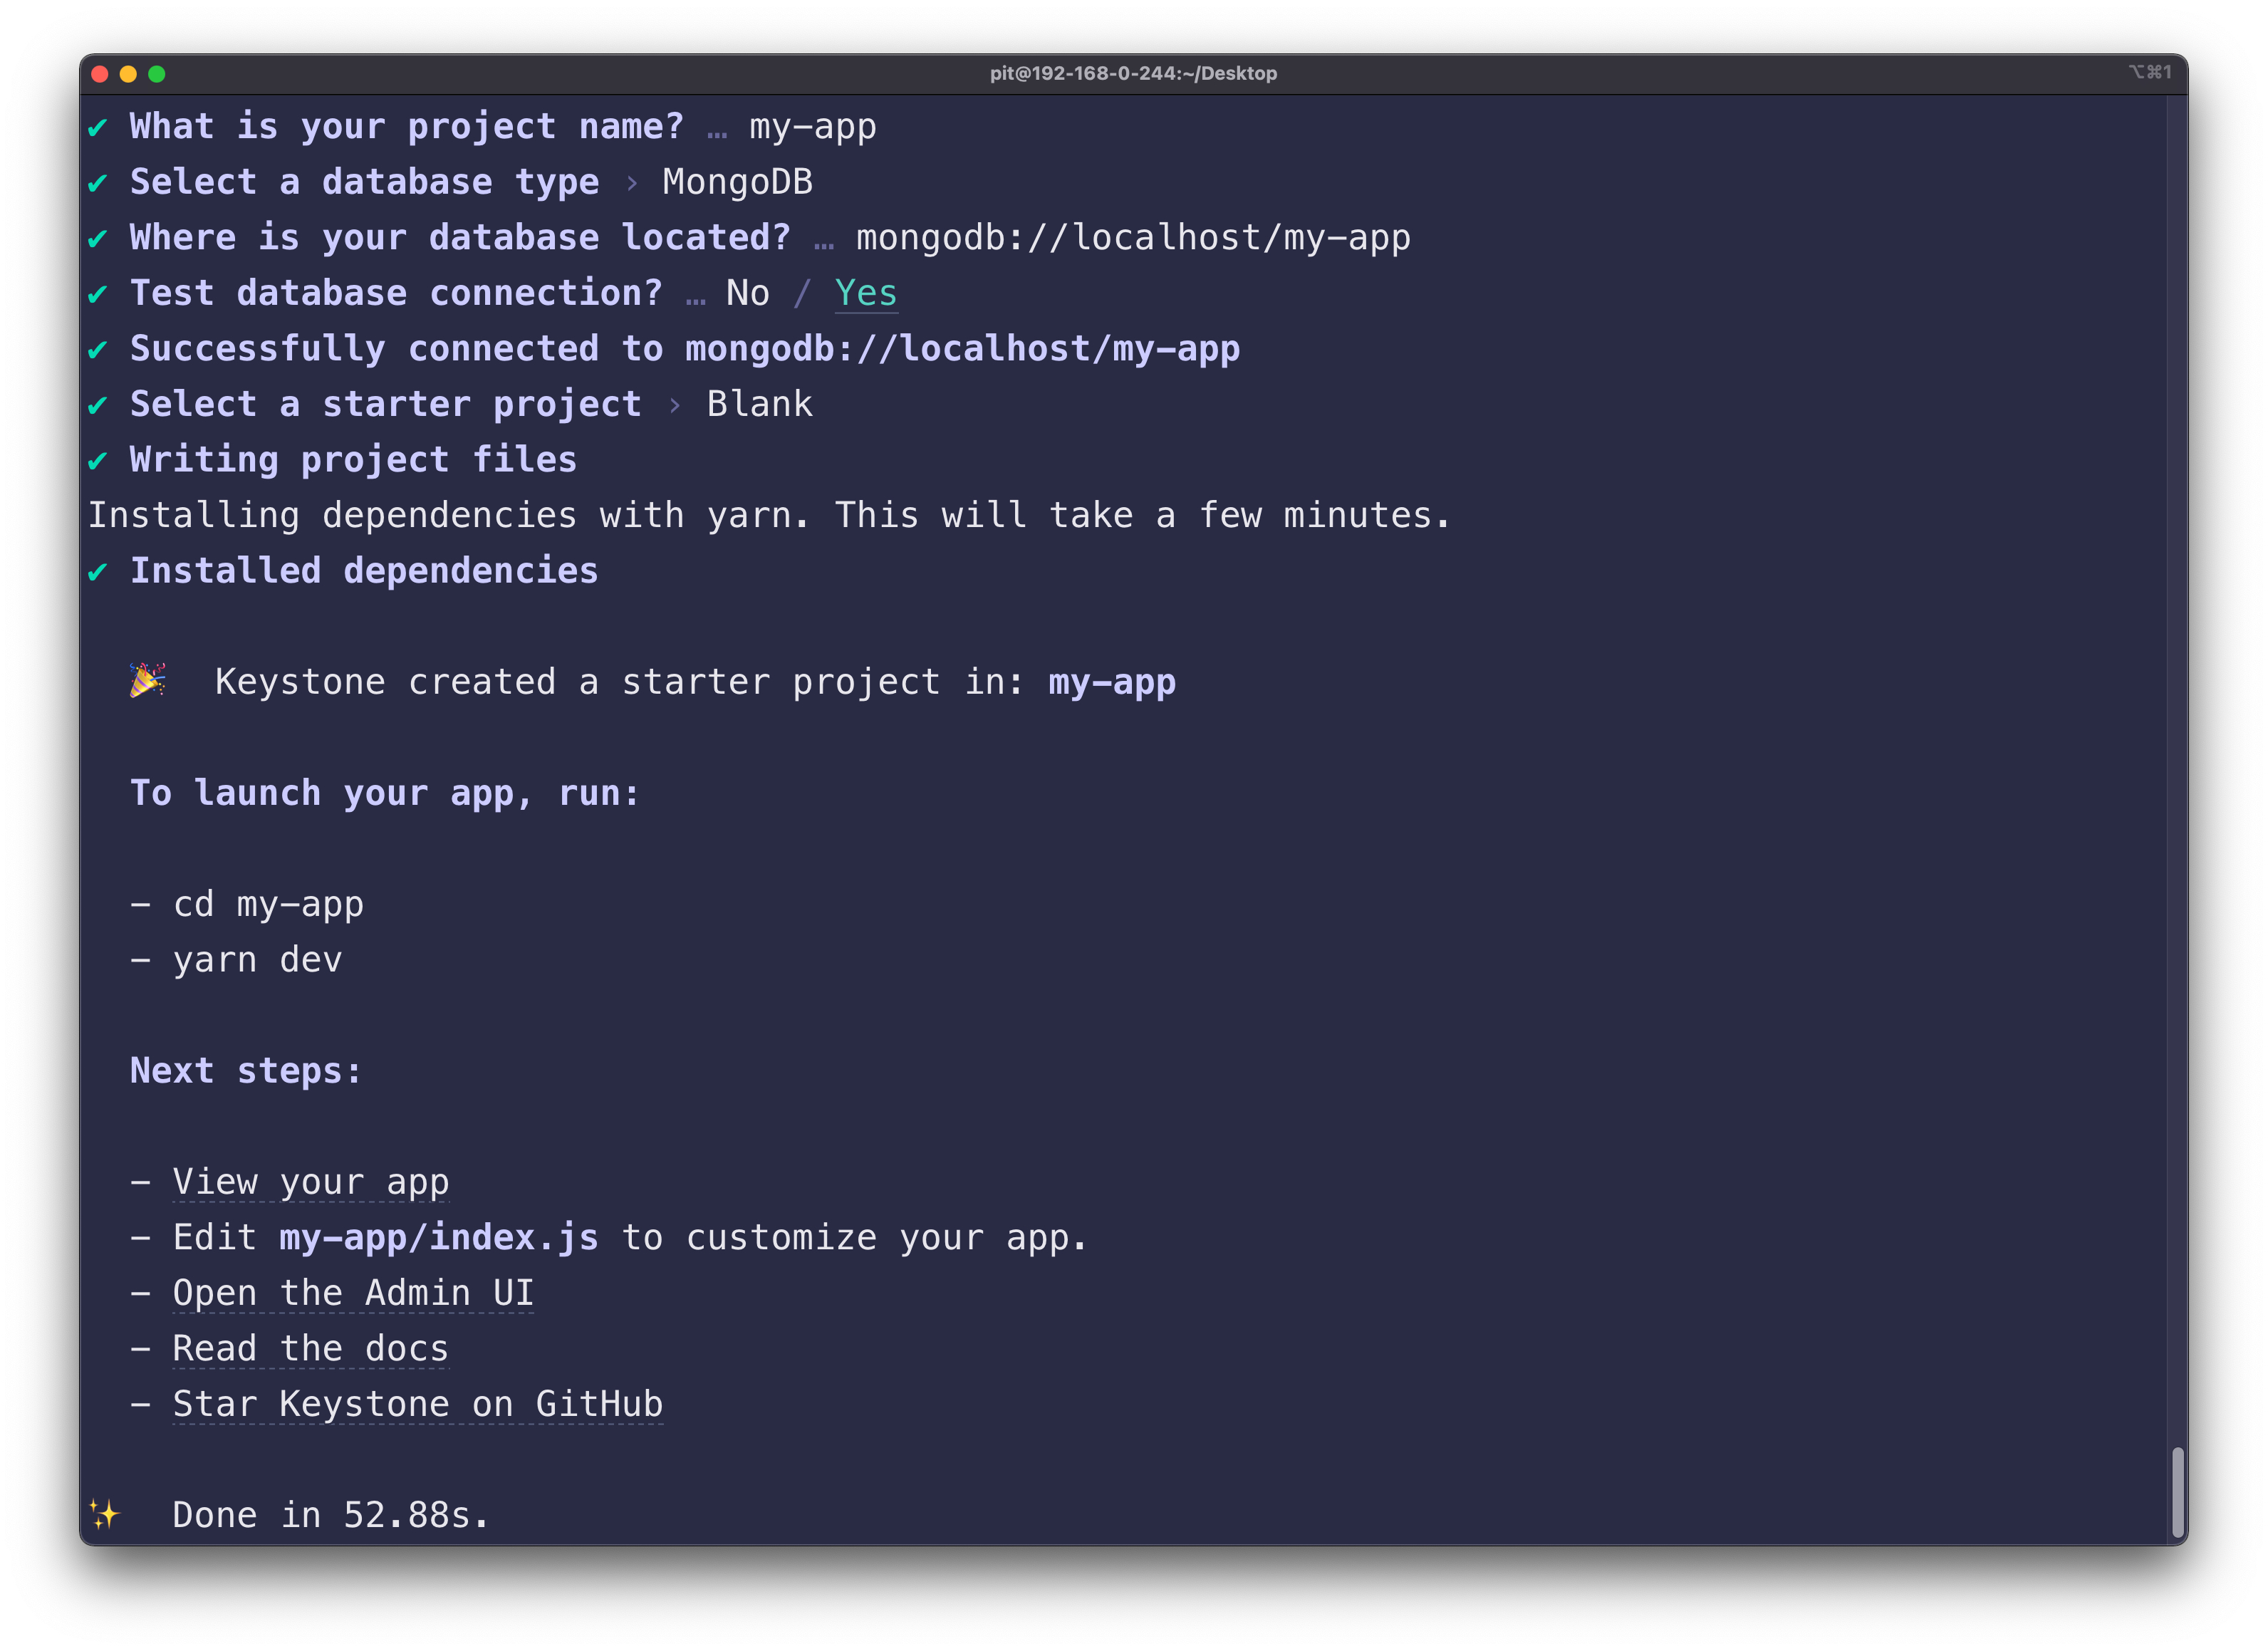
Open the project to start customizing it:
cd my-app(replacemy-appwith your project name)- Open the project in a code editor. If you’re very new to development, GitHub’s Atom is a good one to start with.
Note: You can start the application by running yarn dev to confirm everything is set up correctly, but there is not much to see, so let’s customize it.
3. First, the KeystoneJS basics
There are some important things to know about KeystoneJS before moving on.
Lists
Lists are a way of representing data. If you worked with Node.js and MongoDB, you could associate lists with models. For instance, in this application, we have a list for users. That is a model for the user. The list specifies what you store about each user, where the fields come into play. Read more about lists here.
Fields
Lists are made of fields. A field represents a piece of information (in our example, information about the user). For instance, in the “user” list, you might add fields such as:
firstNamelastNameemail- … etc.
It’s helpful to see it represented in an example. Below is a possible representation of the User list.
const { Text, Password } = require('@keystonejs/fields');

module.exports = {
    fields: {
        firstName: {
            type: Text,
            isRequired: true
        },
        lastName: {
            type: Text,
            isRequired: true
        },
        username: {
            type: Text,
            isRequired: true
        },
        password: {
            type: Password,
            isRequired: true
        }
    }
}
The User list has the following fields for the user:
firstNamelastNameusernamepassword
For those new to development, make sure you have a clear understanding of lists and fields before moving on.
4. Create a folder structure
We’ll need to set up the folder structure for the application.
Start by creating a new folder, schemas, in the root folder of the project. This is where we’ll put lists. “Schema” is a good term to use because it helps self-describe the GraphQL API role, but you can name it lists, models, or anything you prefer.
In the newly-created folder (schemas), create a new file called User.js.
Your project structure should look like this: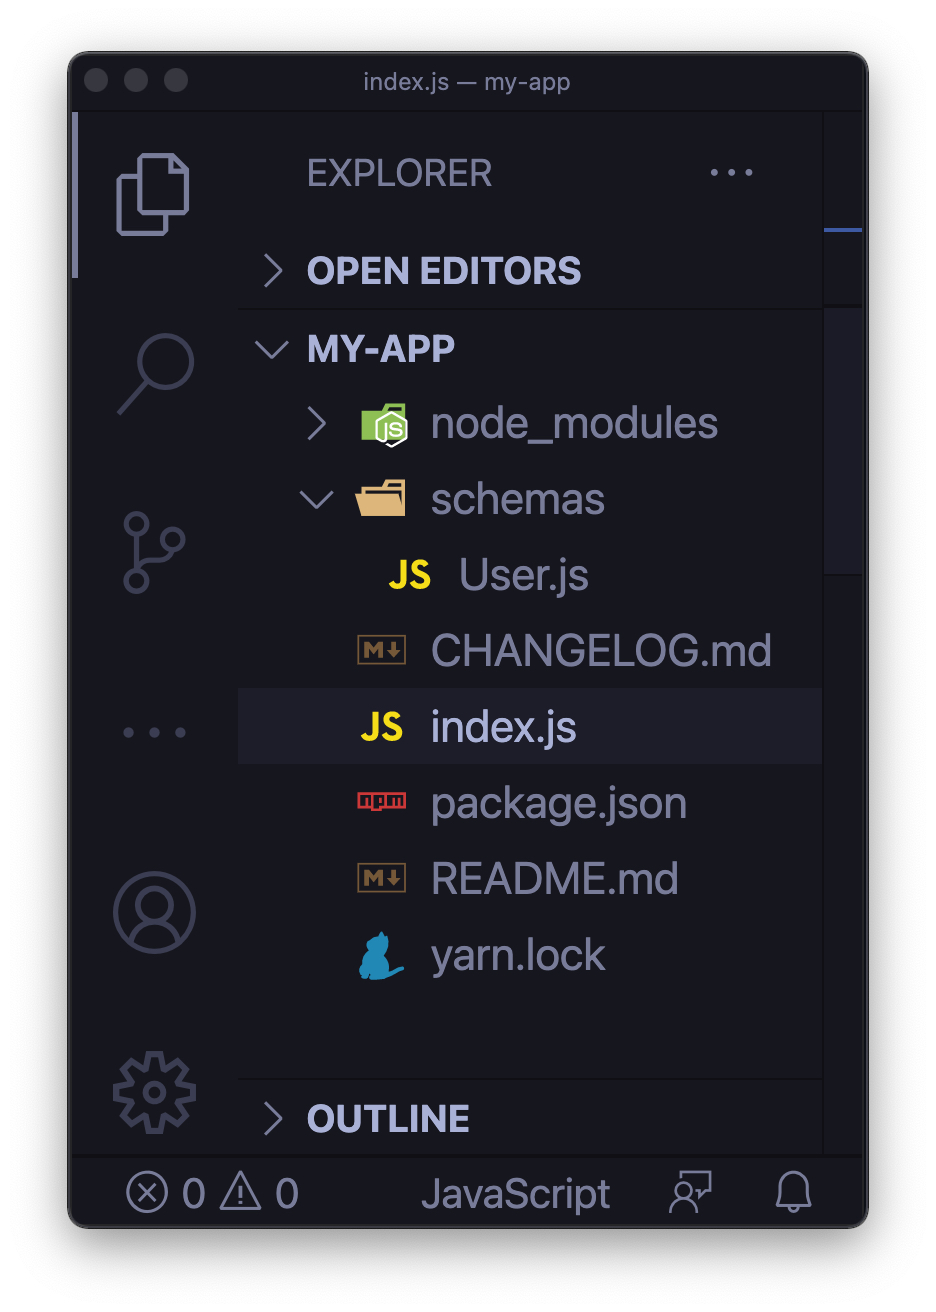
5. Create the User list (model)
Now that you have the project structure in place, let’s create the User list. Open the file schemas > User.js and add the code below:
const { Text, Password } = require('@keystonejs/fields');

module.exports = {
    fields: {
        firstName: {
            type: Text,
            isRequired: true
        },
        lastName: {
            type: Text,
            isRequired: true
        },
        username: {
            type: Text,
            isRequired: true
        },
        password: {
            type: Password,
            isRequired: true
        }
    }
}
In this application, only the user’s first name, last name, username and password are stored. It’s important to note that you imported the fields Text and Password from '@keystonejs/fields'. This is a package containing a set of primitive field types.
It’s relatively easy to create custom fields, but for the purposes of this article we’ll restrict usage to those that are pre-defined.
Use the User list
Even though a list has been created, it can’t be used yet. Head back to index.js and add the following code to the top of the file:
const UserSchema = require('./schemas/User');
This imports the User list into the index.js file so it can be used. Next, add this line after the keystone constant:
keystone.createList('User', UserSchema);
This creates a User list with the schema you created and specified. Now, the index.js file should look like this:
const { Keystone } = require('@keystonejs/keystone');
const { GraphQLApp } = require('@keystonejs/app-graphql');
const { AdminUIApp } = require('@keystonejs/app-admin-ui');
const { MongooseAdapter: Adapter } = require('@keystonejs/adapter-mongoose');
const UserSchema = require('./schemas/User');
const PROJECT_NAME = 'my-app';
const adapterConfig = { mongoUri: 'mongodb://localhost/my-app' };

const keystone = new Keystone({
  adapter: new Adapter(adapterConfig),
});

keystone.createList('User', UserSchema);

module.exports = {
  keystone,
  apps: [new GraphQLApp(), new AdminUIApp({ name: PROJECT_NAME, enableDefaultRoute: true })],
};
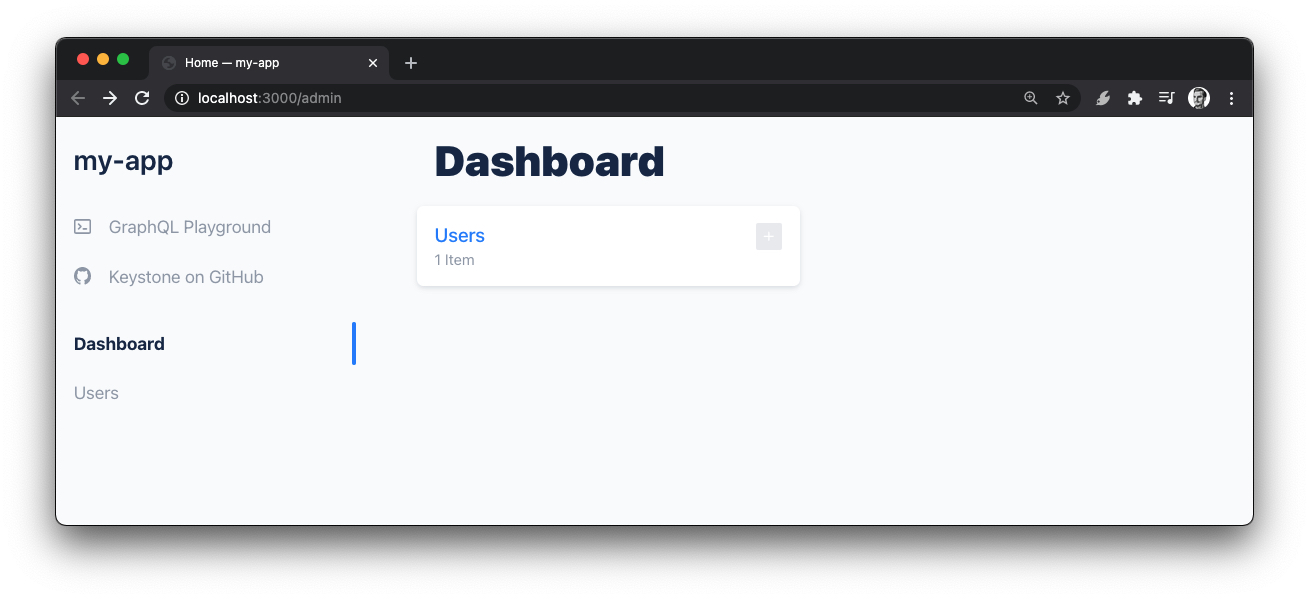
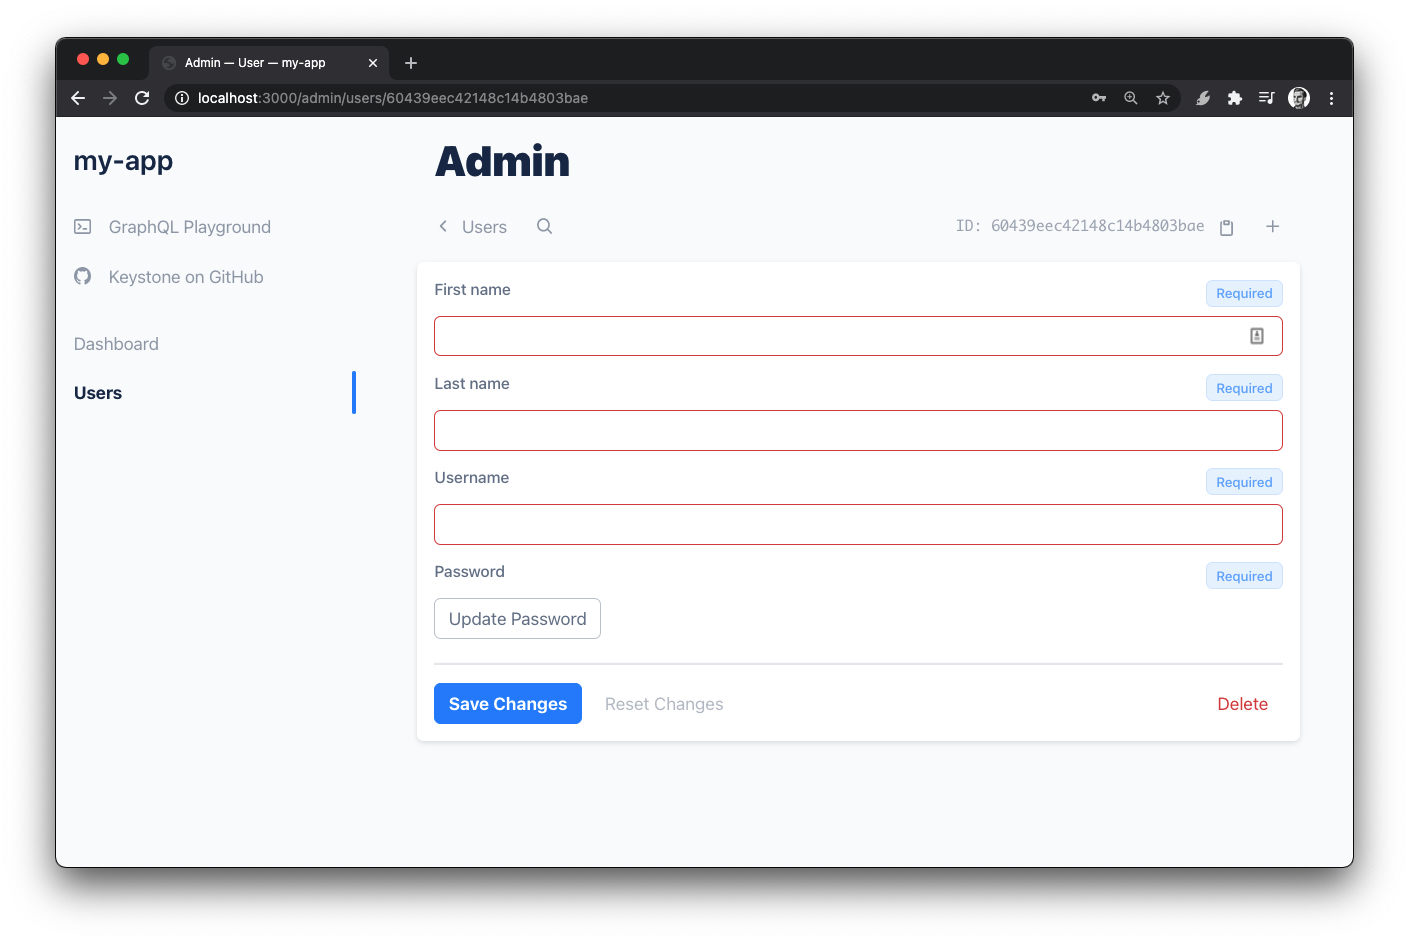
Save all the files, and run yarn dev in the terminal to start the application. Once the application started, open http://localhost:3000/admin in a browser window.
You should see the Users and the fields you created! It should look like this:
6. Create the Book list (model)
The next step is to create a Book model. In this example, users will be able keep track of books they’re reading.
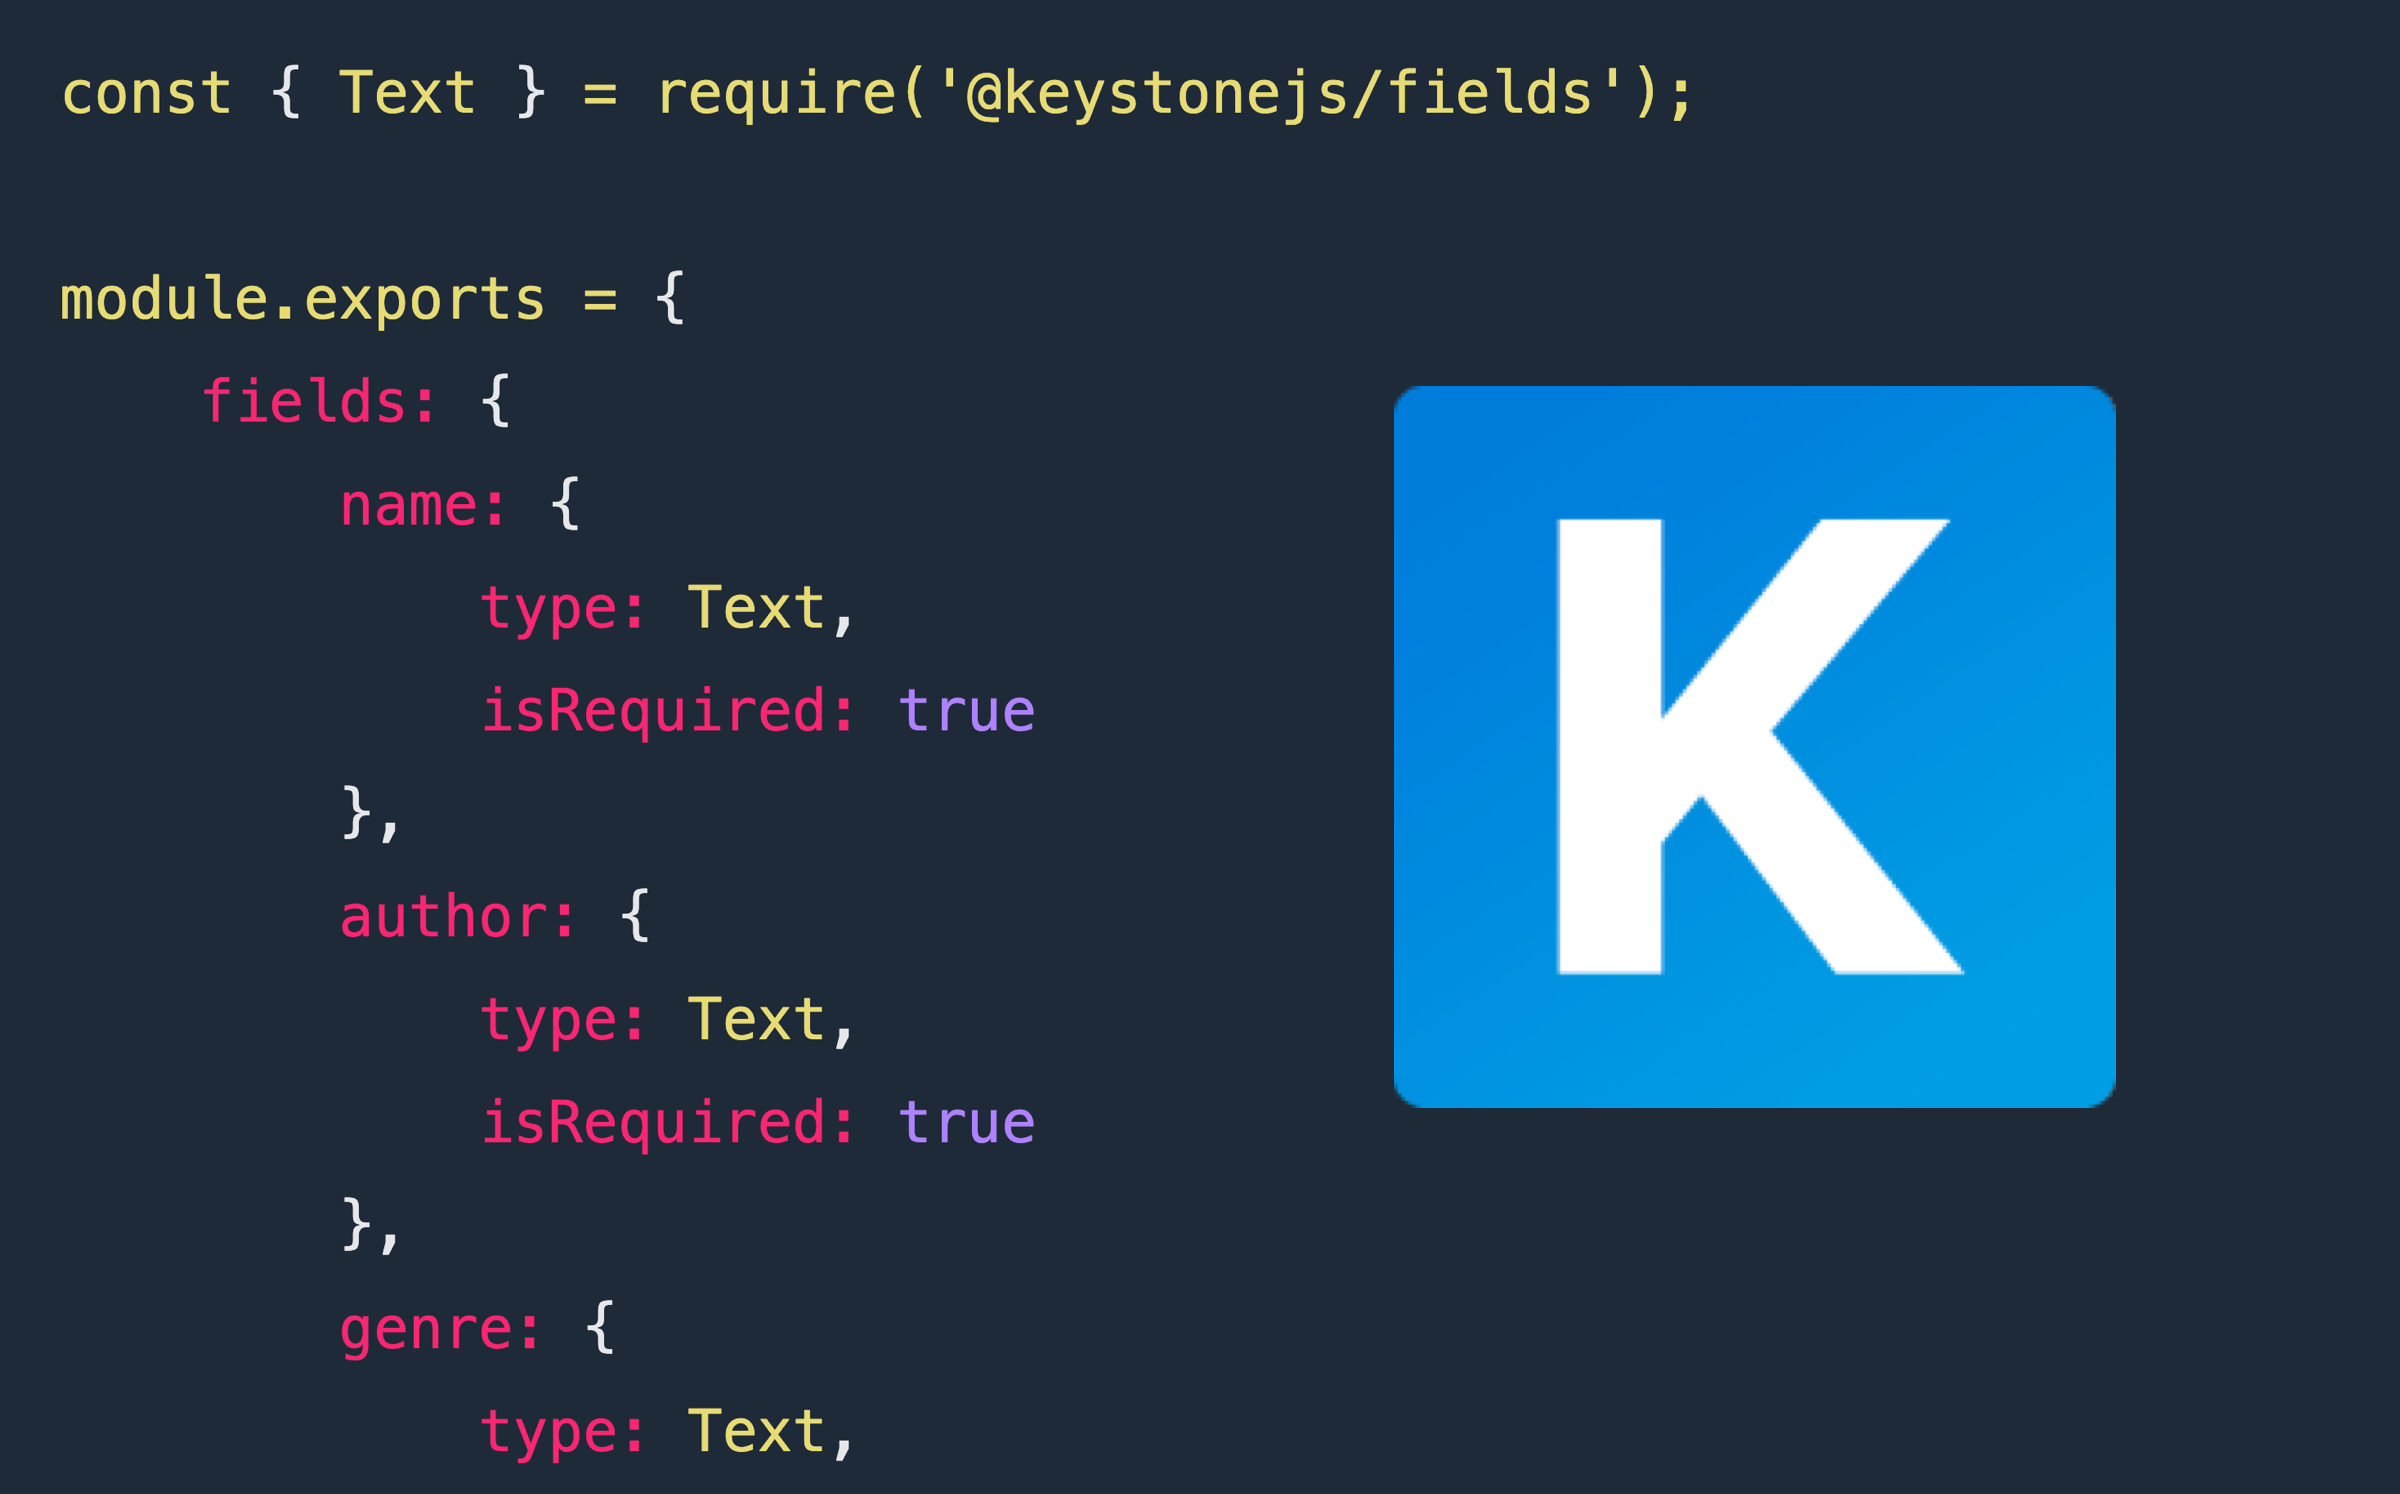
Create a new file, Book.js, in the schemas folder. Once the file is created, add the following code (feel free to modify it as you wish):
const { Text } = require('@keystonejs/fields');

module.exports = {
    fields: {
        name: {
            type: Text,
            isRequired: true
        },
        author: {
            type: Text,
            isRequired: true
        },
        genre: {
            type: Text,
            isRequired: true
        },
        description: {
            type: Text,
            isRequired: true
        },
        edition: {
            type: Text,
            isRequired: true
        }
    }
}
You’ll notice that this is similar to how we created the User list.
Note: Remember that there are other fields that can be added referenced in the documentation. For the sake of example, we’ll keep it simple by using the Text field. Other fields will need to be installed using npm/yarn.
Next, we’ll need to include the new schema and use it in the index.js file. As with the User list, open index.js and add the following:
const BookSchema = require('./schemas/Book');
keystone.createList('Book', BookSchema);
Now, index.js file should look as follows:
// [...code removed for simplicity purposes...]
const UserSchema = require('./schemas/User');
const BookSchema = require('./schemas/Book');
const PROJECT_NAME = 'my-app';
const adapterConfig = { mongoUri: 'mongodb://localhost/my-app' };

const keystone = new Keystone({
  adapter: new Adapter(adapterConfig),
});

keystone.createList('User', UserSchema);
keystone.createList('Book', BookSchema);

// [...code removed for simplicity purposes...]
At this point, we have the User and Book lists in place. Next, we’ll need to create the relationship between them.
7. Create the relationship: User - Books
When models are created, there is no relationship between the two. We’ll need to associate a book with a user.
When creating relationships, consider that:
- A user can have many books.
- A book can have multiple readers (users).
If you’re new to development, this is what’s known as a many-to-many data model.
Update User.js
We’ll need to import the Relationship field to User.js:
const { Text, Password, Relationship } = require('@keystonejs/fields');
Next, add a new field with a Relationship type. Add the following code in User.js, after the password field:
books: {
    type: Relationship,
    ref: 'Book.readers',
    many: true
}
Let’s take a step back and look at each field, one-by-one, to review their role:
type: Relationship- like the type for theusernamefield is “text”, we have “relationship” for this field.ref: 'Book.readers'- this field indicates that thebooksfield relates to thereadersfield in theBooklist.many: true- each user can read many books, and each book can have many readers (many-to-many relationship).
Update Book.js
We’ll need to do something similar to the Book list. Open the Book.js file and import the Relationship field.
const { Text, Relationship } = require('@keystonejs/fields');
Next, add the following code after the edition field:
readers: {
    type: Relationship,
    ref: 'User.books',
    many: true
}
This is effectively the same update as the one made to User.js, except using ref: 'User.books' instead of 'Book.readers'.
The relationships are established
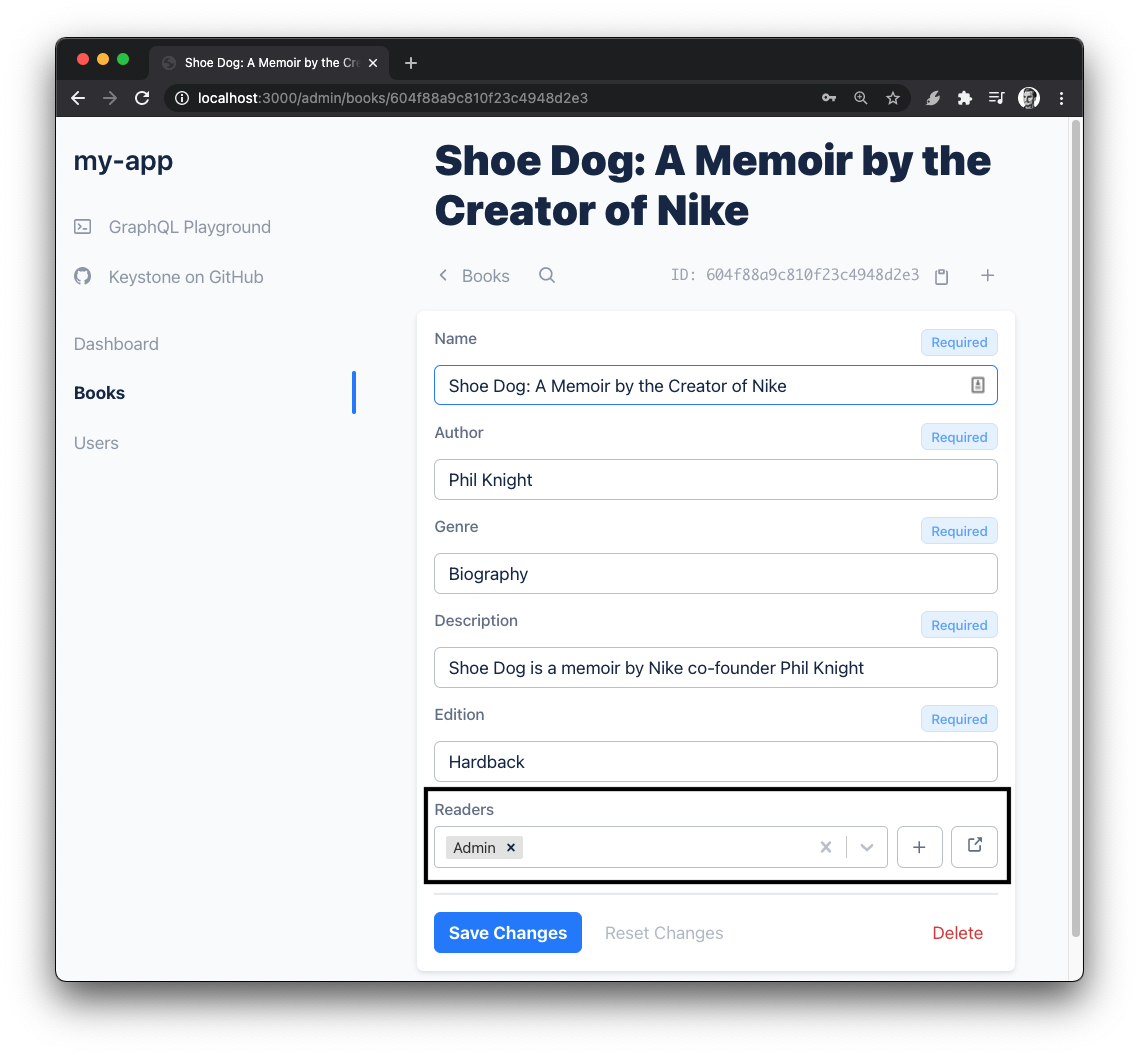
Well done! We created the relationship between Readers and Books to fulfill our use case. Test the relationship by adding readers and books and link them.
Here’s a reader and book example: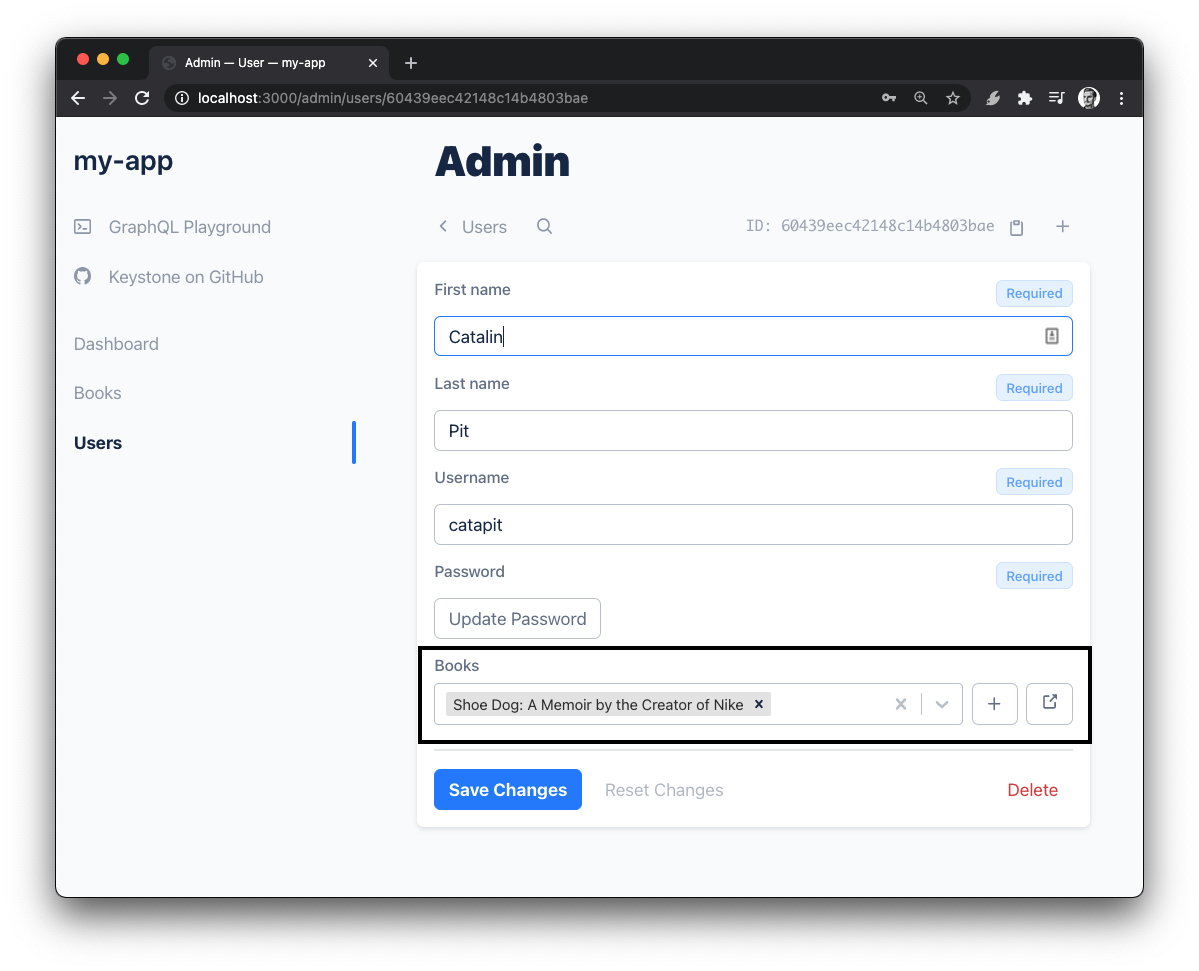
The basic functionalities up and running. To expand on this exercise and get a better feel for KeystoneJS, add the following:
- Create a
Reviewmodel. - Create the relationship between the models (e.g. a book can have multiple reviews, each author can leave multiple reviews, and so on).
- Test it.
Admin field
Apps like this one will typically have different “roles” for users, like administrators who maintain and moderate it. Let’s set up user roles and authentication to verify a what role(s) users have the authorization for.
Before moving onto authorization and authentication, you need to add a new field to the User list. The new field is called isAdmin, and it’s used to give a user admin privileges.
Go to the schemas folder and open User.js. At the top of the file, import the Checkbox field:
const { Text, Password, Relationship, Checkbox } = require('@keystonejs/fields');
Next, add the following field anywhere you want in the file:
isAdmin: {
    type: Checkbox,
    defaultValue: false
}
Now when a user is created, it can be assigned a role. This will require creating at least 2 users:
- An admin user.
- A normal user.
We’ll need both to be able to test the application.
Authentication & Authorization
If you’re new to development and authorization, I recommend reading Authentication versus Authorization from Okta before proceeding. This article does a great job of explaining the difference between the two.
Focusing back on our application, we can recognize that there’s a major flaw in that every user is able to make all possible modifications. We’ll want to design it so that only certain users are able to make certain modifications (admins vs. non-admins).
So let’s restrict access to the admin panel, accessing & modifying resources.
Check permissions
The first step is to open your index.js file and write the following code after the Keystone constant (const keystone.....):
const isAdmin = ({ authentication: { item: user } }) => !!user && !!user.isAdmin;
const isLoggedIn = ({ authentication: { item: user } }) => !!user;

const isOwner = ({ authentication: { item: user } }) => {
  if (!user) {
    return false;
  }

  return { id: user.id }
}

const isAdminOrOwner = auth => {
  const admin = access.isAdmin(auth);
  const owner = access.isOwner(auth);

  return admin ? admin : owner;
}

const access = { isAdmin, isOwner, isLoggedIn, isAdminOrOwner };
There are a few things being added here. Let’s break it down:
isAdminchecks if a user is an admin and it grants/rejects access to the admin panel based on that.isLoggedInsimply checks if the user is authenticated.isOwnerchecks if the user is the owner of the resource or not. For instance, you might want to restrict users from deleting resources NOT created by them.isAdminOrOwnerchecks if the user is an admin or an owner and returns the value.
In the last line, we add the functionalities on the access object so we can access them as access.isAdmin, for example.
Modify Lists
Now that the methods are defined, let’s put them to use. Open the index.js file and locate the following code:
keystone.createList('User', UserSchema);
keystone.createList('Book', BookSchema);
What we’ll do is change this to an object instead of the schema. Replace those 2 lines with the following:
keystone.createList('User', {
  fields: UserSchema.fields,
  access: {
    read: access.isAdminOrOwner,
    create: access.isAdmin,
    update: access.isAdmin,
    delete: access.isAdmin,
    auth: true
  }
});

keystone.createList('Book', {
  fields: BookSchema.fields,
  access: {
    read: true,
    create: access.isLoggedIn,
    update: access.isAdminOrOwner,
    delete: access.isAdminOrOwner,
    auth: true
  }
});
Now instead of providing the schema directly, we’re proving an object. In fields, we’re adding the fields from the schemas created at the beginning of the article. For all intents and purposes, these are about the same:
keystone.createList('User', UserSchema);

// or

keystone.createList('User', { fields: UserSchema.fields});
The difference is the access object - which allows tighter control of the resources (user role). You can see that the code reads rather intuitively, and for each CRUD database operation (create, read, update and delete), permission access is specified.
In other words, only the admins will be able to create/read/update/delete other users. Additionally, the users can only see their own accounts, but not other users' accounts, users will be able to read book reviews from others (read: true), and only admins will be able to add/delete books.
Create an authStrategy
To accomplish this, install the auth-password package. It can be installed via npm or yarn:
npm install @keystonejs/auth-password
Or,
yarn add @keystonejs/auth-password
After the package is installed successfully, add the following line at the top of the index.js file:
const { PasswordAuthStrategy } = require('@keystonejs/auth-password')
Now we’re ready to configure the authentication. Add the following code before the module.exports line:
const authStrategy = keystone.createAuthStrategy({
  type: PasswordAuthStrategy,
  list: 'User',
  config: {
    identityField: 'username',
    secretField: 'password'
  }
})
Here a authStrategy constant is created, its type, the list that should be used (User in this case), and the fields used to log in. In this application, users will log in using their username and password.
Take a look at authStrategy and isAccessAllowed: isLoggedIn below. This will pass in the authStrategy and restrict access to the admin panel if the user is not logged in.
module.exports = {
  keystone,
  apps: [
    new GraphQLApp(),
    new AdminUIApp({
      name: PROJECT_NAME,
      enableDefaultRoute: true,
      authStrategy,
      isAccessAllowed: isLoggedIn
    })],
};
Save everything, and run the application - yarn dev.
Unless there were any issues with implementation, you should now have authorization and authentication set up! Now the admin has full access, and other users are limited to creating books and managing their books.
Note that, currently, isAccessAllowed: isLoggedIn allows everyone to access the admin page as long as they are logged in. This should be restricted to just admins, so change that line to:
isAccessAllowed: isAdmin
Caveat for the isAdmin field
Before implementing authentication and authorization, we added the isAdmin field for users. There is one problem, though - everyone can make themselves admin. Let’s restrict that.
Open the User.js file, and modify the field as follows:
isAdmin: {
    type: Checkbox,
    defaultValue: false,
    access: ({ authentication: { item: user } }) => {
        return user.isAdmin
     }
 }
Now only admins can make other users an admin.
NOTE: The way you set the access field is similar to how you did it in the index.js file for the User and Book lists.
Conclusion
In this crash course tutorial, we covered the fundamentals of KeystoneJS. This type of application can of course be applied for all sorts of use cases, and KeystoneJS makes it easy to add new features.
Some ideas:
- Add a front-end.
- Allow people to comment on books.
- Create profiles for each user.
Catalin regularly posts helpful development tips and guides on Twitter. Be sure to follow him at @catalinmpit